Wednesday, October 23, 2013
Wintercoat: Recutting patterns, fixing sewing machine and altering lengths
So after my prototype I concluded that my coat had to be bigger for a better fit. It fitted a little snug when wearing a sweater underneath. Since it's a winter coat I need to wear it over layers of warm clothing. So I added a size for better fit and I also added a size because of the batting.
I added 10cm to the sleeves.
I also decided to use the shorter version of the pattern. With the prototype I used the 'Thigh length' but I thought this was too long so I used the Hip length right now. Gonna alter the prototype first to check if the length suits me better.
Also need to send my sewing machine away to get fixed. I have a spare one but this one doesn't work as well as my own. Luckily my father offered to drive me and my sewing machine to the shop, since my sewing machine weighs a ton and the nearest service point which fixes my sewing machine is in Zaandam.

Sunday, October 20, 2013
Wintercoat: Fabric and prototype update
So my lovely readers/watchers/followers/blog reading people,
I present to you the much anticipated fabric picture.

It's a bad cameraphone picture with flash, but you get an idea. The red is not as prominent as in this picture. But it's pretty and the black lining is taffeta which I bought at the market on discount.
With that being said I have made the prototype. I hadn't put the sleeves in, but just pinned it on the prototype, because I hate doing sleeves and I just had to get a general idea of fit and length for the sleeves. Again a bad cameraphone picture.
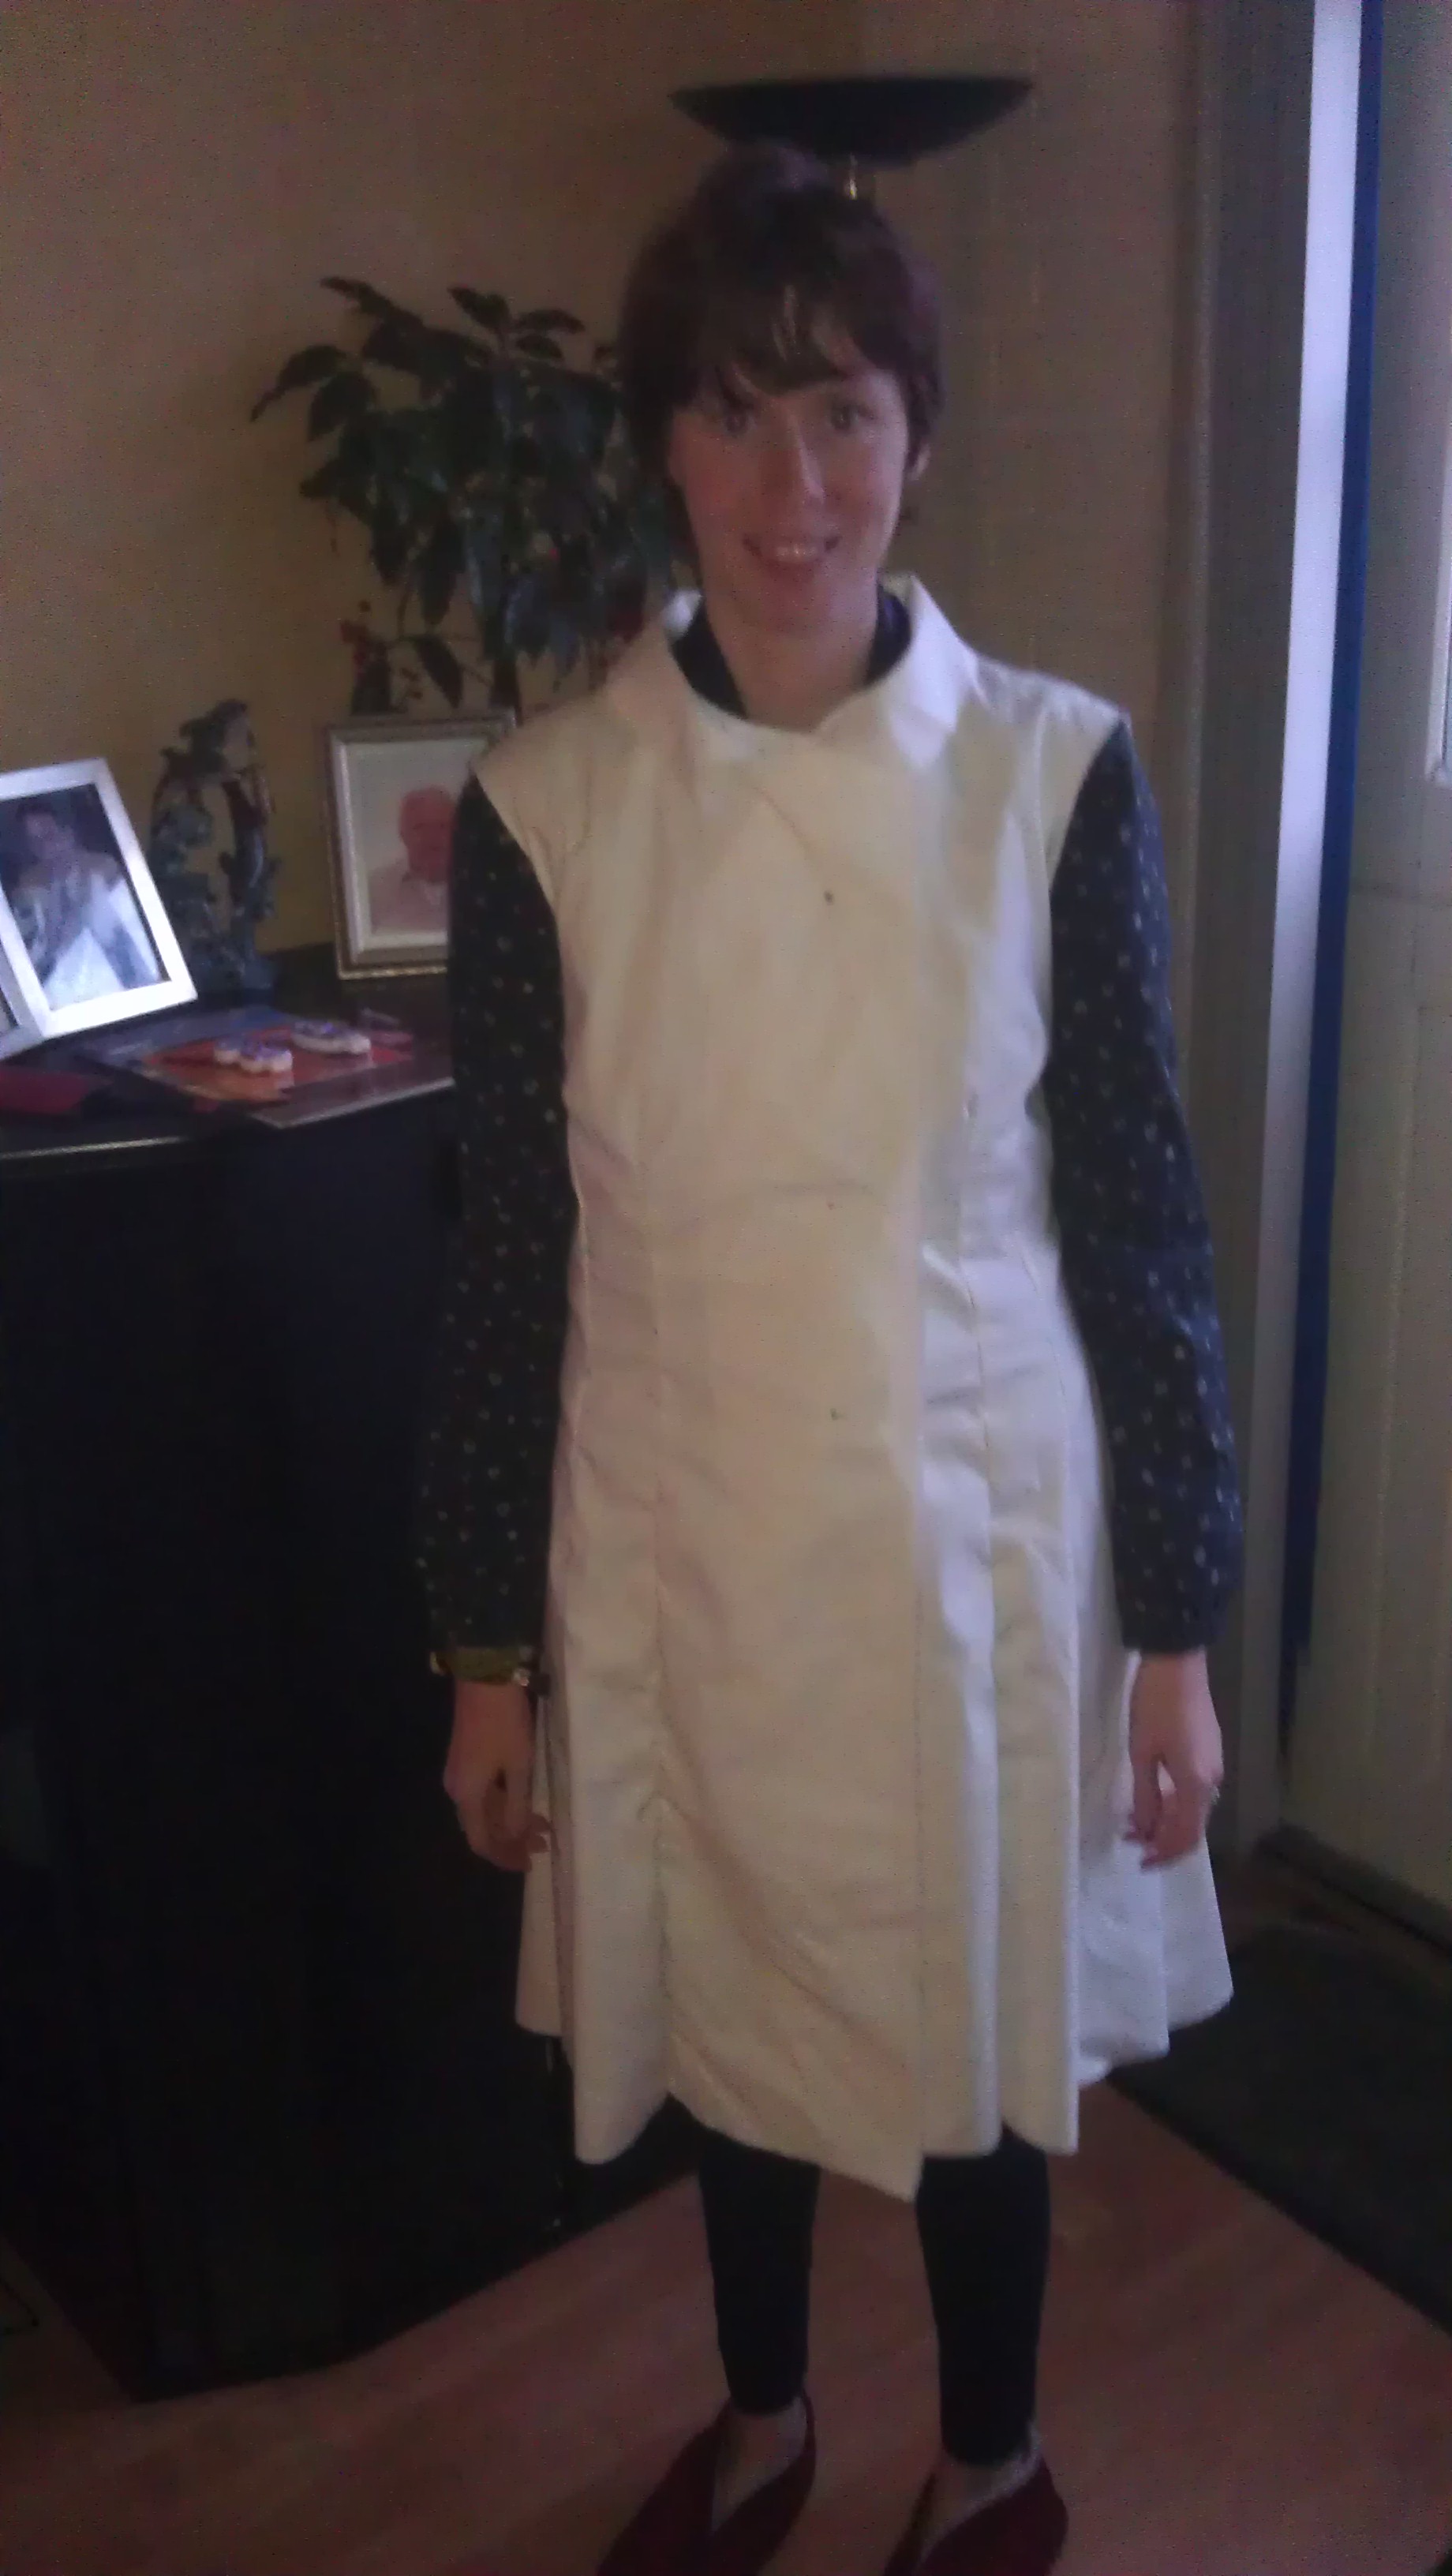
I'm pretty happy with it altogether. It's an easy pattern to sew together, perhaps I'll make more coats using this pattern :P
Well this week I'll be cutting my fabric pieces in a larger size. I have to do this for 3 different fabrics (fashion fabric, batting and lining) and I'm still debating adding another think layer between the fashion fabric and batting for adding warmth and water resisting to my coat. Tell me what you think, my dearies.
Wednesday, October 2, 2013
Wintercoat: small update
Just a small post without any pictures about the wintercoat.
I've received my batting (fiberfill) yesterday. It's a big box that doesn't weigh anything, but sits in the way. So I stored it in the shed waiting to be used.
I have also traced all the patterns in size C. Which was most like my sizes according to the size chart. I'm going to make a prototype for adjusting the sizes, because it won't fit at all places. I have some left over fabrics which will be nice to use for the prototype.
Friday night I can start cutting the prototype fabric pieces. I probably won't do this all in one night.I don't have a high, flat, large enough table, so I cut my pieces on the ground. After cutting a few pieces my legs, butt and back hate me.
Hopefully my fabric is ready for pick-up this Saturday. This way I can see if I think I need a stronger fabric between the layers to add warmth and toughness. I couldn't really determine this with just the small sample and the liningfabric without the batting.
My fashion fabric is really pretty. I forgot to take a picture at the market, but when it arrives I'll make pictures.
I've received my batting (fiberfill) yesterday. It's a big box that doesn't weigh anything, but sits in the way. So I stored it in the shed waiting to be used.
I have also traced all the patterns in size C. Which was most like my sizes according to the size chart. I'm going to make a prototype for adjusting the sizes, because it won't fit at all places. I have some left over fabrics which will be nice to use for the prototype.
Friday night I can start cutting the prototype fabric pieces. I probably won't do this all in one night.I don't have a high, flat, large enough table, so I cut my pieces on the ground. After cutting a few pieces my legs, butt and back hate me.
Hopefully my fabric is ready for pick-up this Saturday. This way I can see if I think I need a stronger fabric between the layers to add warmth and toughness. I couldn't really determine this with just the small sample and the liningfabric without the batting.
My fashion fabric is really pretty. I forgot to take a picture at the market, but when it arrives I'll make pictures.
Monday, September 30, 2013
Wintercoat and crinoline.
Hey followers,
I have started a new project and hopefully I'll do a better job of keeping you informed of it. So here goes.
I'm actually starting 2 projects.
First off: Wintercoat
A stand alone project with no clear deadline, but hopefully I finish it before winter ends. I'm going to make a winter coat. For this I'm using patterns from Truly Victorian.Namely Truly Victorian 1880s Late Bustle Coat

I'm going to make the right one with the collar of the right one. I have ordered the fashion fabric and wattine, since they didn't have it in stock at the market I went to. Hopefully I can pick it up next weekend.
I did buy the interfacing fabric for the inside. I'm still debating if I'm gonna use a fashion lining or just use the plain linnen fabric I bought. Perhaps when I have all my fabrics you're gonna help me decide?
This is the first time I'm going to make something that I can and will be using on a daily basis. So I can't cut corners and need to be precise. Because if I'm not happy with it I won't wear it.
So before I'm using the good fabrics I'm going to make a prototype to adjust the fit. I want it to fit snug and pretty, but also comfortable. Perhaps I'm going to add a removable hood for those days you just want a hood on your head.
Second: Crinoline
I'm going to make a crinoline. It's gonna be part of the project for the Elf Fantasy Fair in April 2014, but I'm going to name it separate since I might use it for a multitude of costumes. It will also be usable for dresses I already made. For this I'm using patterns from Truly Victorian.
Namely 1858 Round Cage Crinoline
I like that it's big and plenty of hoops. Together with the bum roll I made for the Miss Hartigan dress it will look fabulous!
For this I have everything I need. I already cut the fabric, but still need to lock the fabric and sew the bag. I hope I have enough strength to cut the hoop wire. But we'll see. At least I bought plenty off it.
It's another first for me since I never made a crinoline and everybody tells me their a bitch to make. So tips are always appreciated.
Miss Hartigan finished results!
Dear lovely followers,


It seems I totally forgot about keeping the progress about the Miss Hartigan Project. I'm so sorry!
Good news is that I finished it and it was awesome!
I'm fairly happy with it. Unfortunaly the colour was not really red, but more copper as you can see in the picture. This meant buying the lace for the sleeves was a bitch. It delayed me a lot and affected my morale.
After my patient parents drove me to Utrecht I comprimes with a wide lace band which I stacked on top of each other to get the lacey effect.
Also I didn't really like the fit around my cleavage. So I had to pin those to my bra so I wouldn't flash people. I still kinda like it. But I don't think I'm gonna wear it very often.
I finished it before the deadline, but I'm not really happy with it. In part because hardly anyone recognized me. Despite me walking with the Tenth Doctor and Tardis. Here we are:
My sister-in-law as Sexy Tardis
My Brother as Tenth Doctor
Me as Miss Hartigan.
Pictures by Zita who I'm not sure if she has a blogspot or a site I can link to for credits.
Wednesday, January 16, 2013
Miss Hartigan dress: Bodice prototype part 2
Sorry everyone for the late post. I didn't really felt like writing it, but I have worked on the dress some more.
Last time I promised pictures of the finished panel. Here you can see it stitched up to the side part. As you can see I have stitched the sides so the 'flaps' stayed down. It made the panel much easier to work with.

 As you can see it doesn't really close that well but I have not put in all the hooks. Nor did I bother to hem and sleeve it. I might decide to put in a regular old zipper or buttons. Haven't really decided as of yet.
So this was Friday when I finished the protoype bodice. That night I went to check on my fabric order. Only to be horrified when I couldn't find my order. When searching the site I realized I never got an email confirming my order, just the email from Paypal that my payment was made.
Luckily after GREAT service from Phil at http://www.the-millshop-online.co.uk/ who responded quickly on my emails everything was straightened out and I received the silk yesterday(tuesday) afternoon.
Here's a picture of me, the prototype bodice on the left and the cut pieces of the skirt on the right.

It's a beautiful deep red colour and very sturdy fabric. I wanted to use the same fabric as the protoype for lining, but decided that lining wasn't necessary for the skirt. Although I still might line the bodice since it does need some extra thickness.
Hopefully I can show more pictures tomorrow.
Last time I promised pictures of the finished panel. Here you can see it stitched up to the side part. As you can see I have stitched the sides so the 'flaps' stayed down. It made the panel much easier to work with.
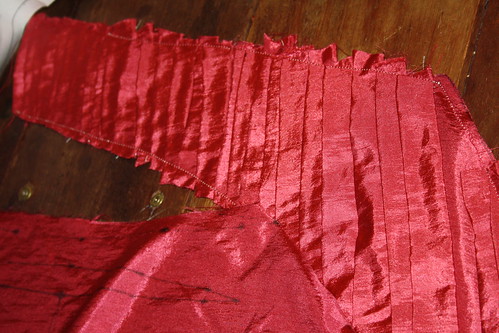
After this I just followed the instructions from the pattern. It was fairly easy.
Here's a picture of the first and only fitting. Since it fit right away I didn't have to alter anything. I might allow a little more seam around my bust, but on the whole it fitter quite nicely.

So this was Friday when I finished the protoype bodice. That night I went to check on my fabric order. Only to be horrified when I couldn't find my order. When searching the site I realized I never got an email confirming my order, just the email from Paypal that my payment was made.
Luckily after GREAT service from Phil at http://www.the-millshop-online.co.uk/ who responded quickly on my emails everything was straightened out and I received the silk yesterday(tuesday) afternoon.
Here's a picture of me, the prototype bodice on the left and the cut pieces of the skirt on the right.

It's a beautiful deep red colour and very sturdy fabric. I wanted to use the same fabric as the protoype for lining, but decided that lining wasn't necessary for the skirt. Although I still might line the bodice since it does need some extra thickness.
Hopefully I can show more pictures tomorrow.
Thursday, January 10, 2013
Miss Hartigan Dress: Bodice Prototype 1
I knew this dress came with a few challenges. The first one was actually easier than I thought (Although I have yet to receive definitive proof that I succeeded, but in theory I have), the second one was just as challenging.
After cutting out all the pattern pieces I had to alter the neckline of the body. This was actually easier done, since the original pattern came with placement lines for fringe, which were an excellent indicator for where I wanted the neckline to go.
Next challenge was the panelling. The pattern has 4 panels, Front left, Side back, Back and Front Right, but the original shows that the front has 4 panels with the 2 centre ones having a sort of strips.

So I had to cut up the pattern to make from 1 panel, 2 panels. You can see it below. The 2 left white pieces used to be one. There was a dart and from that I extended that line to the shoulder.You can see the original (albeit mirrored) pattern next to it.
 Also look at the pretty fabric. Only 1 euro on the market. It has similar texture to silk and some sort of sheen, so it will also give me a fairly accurate representation of the original is silk. What fabric I have left (I bought 10 mtr) will be used for lining.
On to the next challenge. The strips of fabric on the 2 front panels. I had found a site with clear descriptions with pictures with multiple ways to do it, but it went offline.
So I had to gather the memories of the things I read and saw and asked for some advice from my facebook friends to figure it out.
I decided to make strips about 3cm wide (although I'm thinking about going to about 4cm for the original). I did this by cutting strips of 6cm and folding them double, stitching it close and ironing it flat. Then sew them on the panel upside down, and press them back.

Then the helltask of putting them on the panel started. Halfway through I decided that for the original I would just sew them overlapping the right way (so I don't have to press them back). It's thinner and much less work. Since I have to do the 2 front panels and the back pannel this way I don't want to do more work when it looks the same.

I have one panel finished (after 6 hours of work) so I will do only one panel. With the prototype I didn't really bother with making it even and all, but I will do so with the real thing obviously.
Unfortunately I forgot to take a picture of the finished panel so you will see that tomorrow when I putting the bodice together.
My fabric hasn't arrived yet, nor have I received a shipping notice, but hopefully I'll get that soon. Since I plan to have the bodice finished this weekend.
After cutting out all the pattern pieces I had to alter the neckline of the body. This was actually easier done, since the original pattern came with placement lines for fringe, which were an excellent indicator for where I wanted the neckline to go.
Next challenge was the panelling. The pattern has 4 panels, Front left, Side back, Back and Front Right, but the original shows that the front has 4 panels with the 2 centre ones having a sort of strips.

So I had to cut up the pattern to make from 1 panel, 2 panels. You can see it below. The 2 left white pieces used to be one. There was a dart and from that I extended that line to the shoulder.You can see the original (albeit mirrored) pattern next to it.
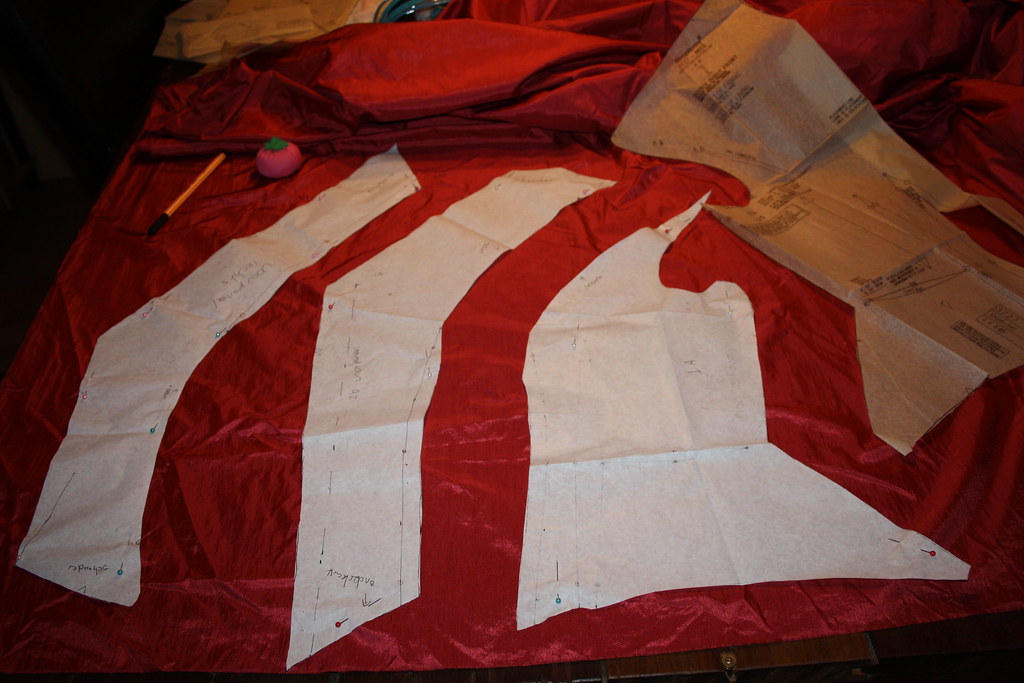
On to the next challenge. The strips of fabric on the 2 front panels. I had found a site with clear descriptions with pictures with multiple ways to do it, but it went offline.
So I had to gather the memories of the things I read and saw and asked for some advice from my facebook friends to figure it out.
I decided to make strips about 3cm wide (although I'm thinking about going to about 4cm for the original). I did this by cutting strips of 6cm and folding them double, stitching it close and ironing it flat. Then sew them on the panel upside down, and press them back.
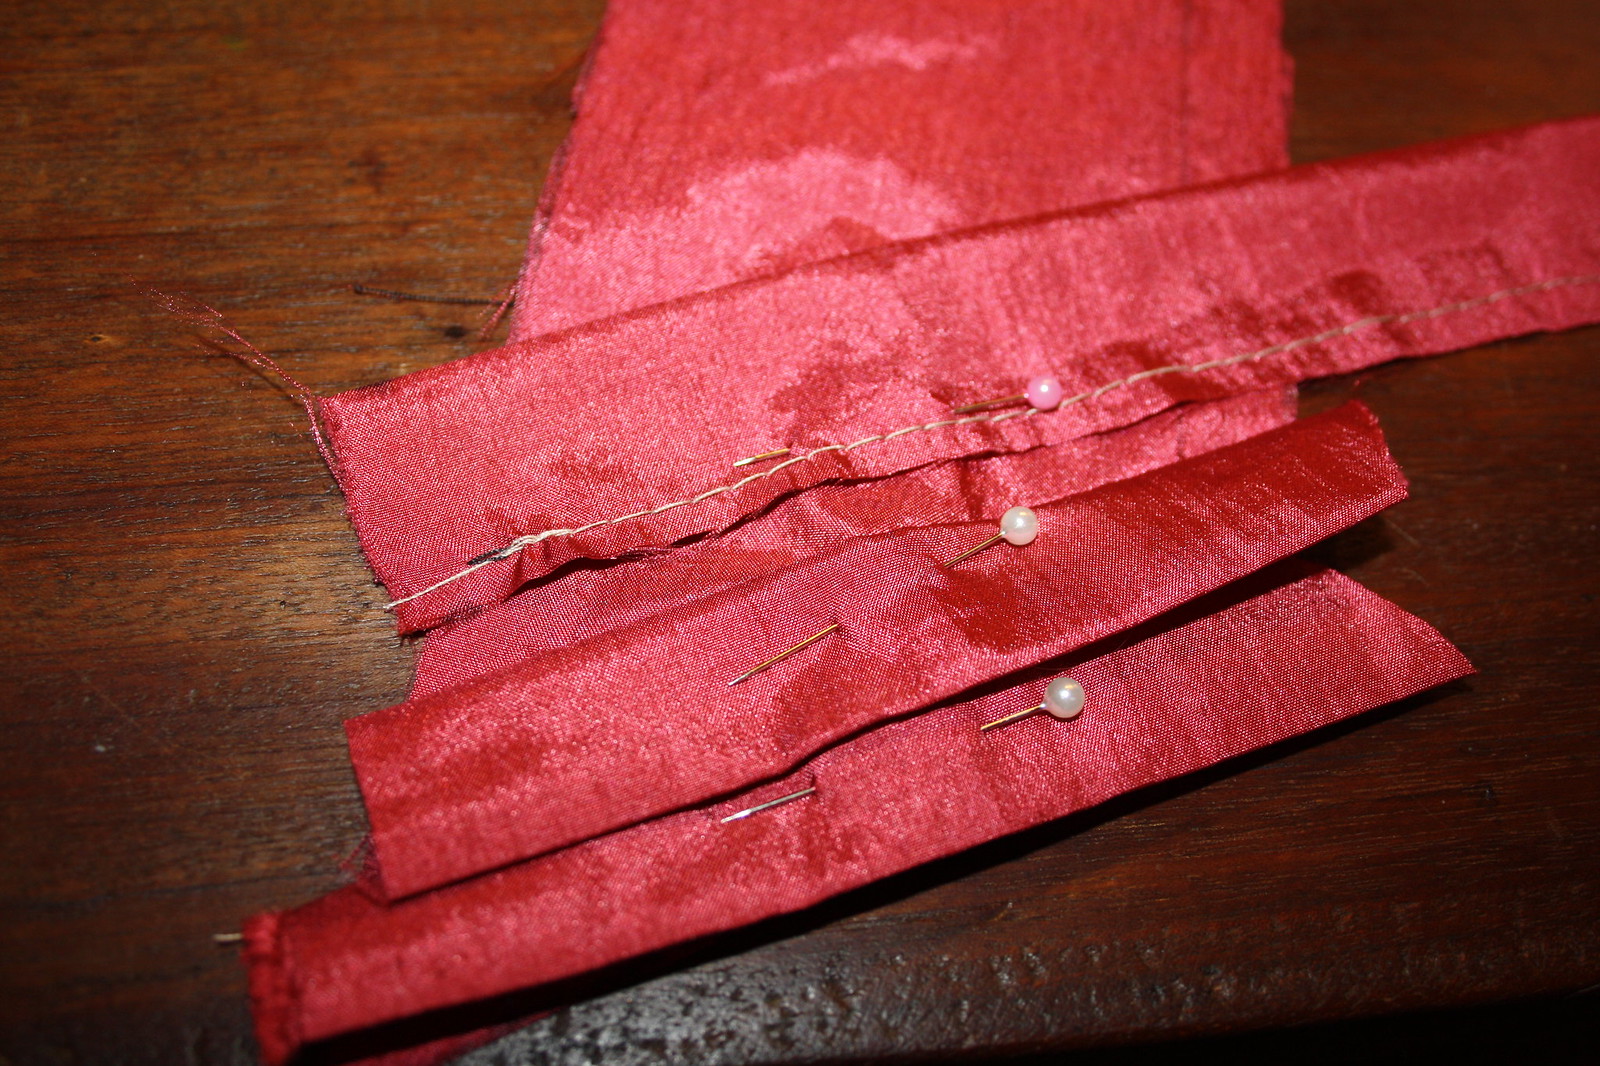
Then the helltask of putting them on the panel started. Halfway through I decided that for the original I would just sew them overlapping the right way (so I don't have to press them back). It's thinner and much less work. Since I have to do the 2 front panels and the back pannel this way I don't want to do more work when it looks the same.
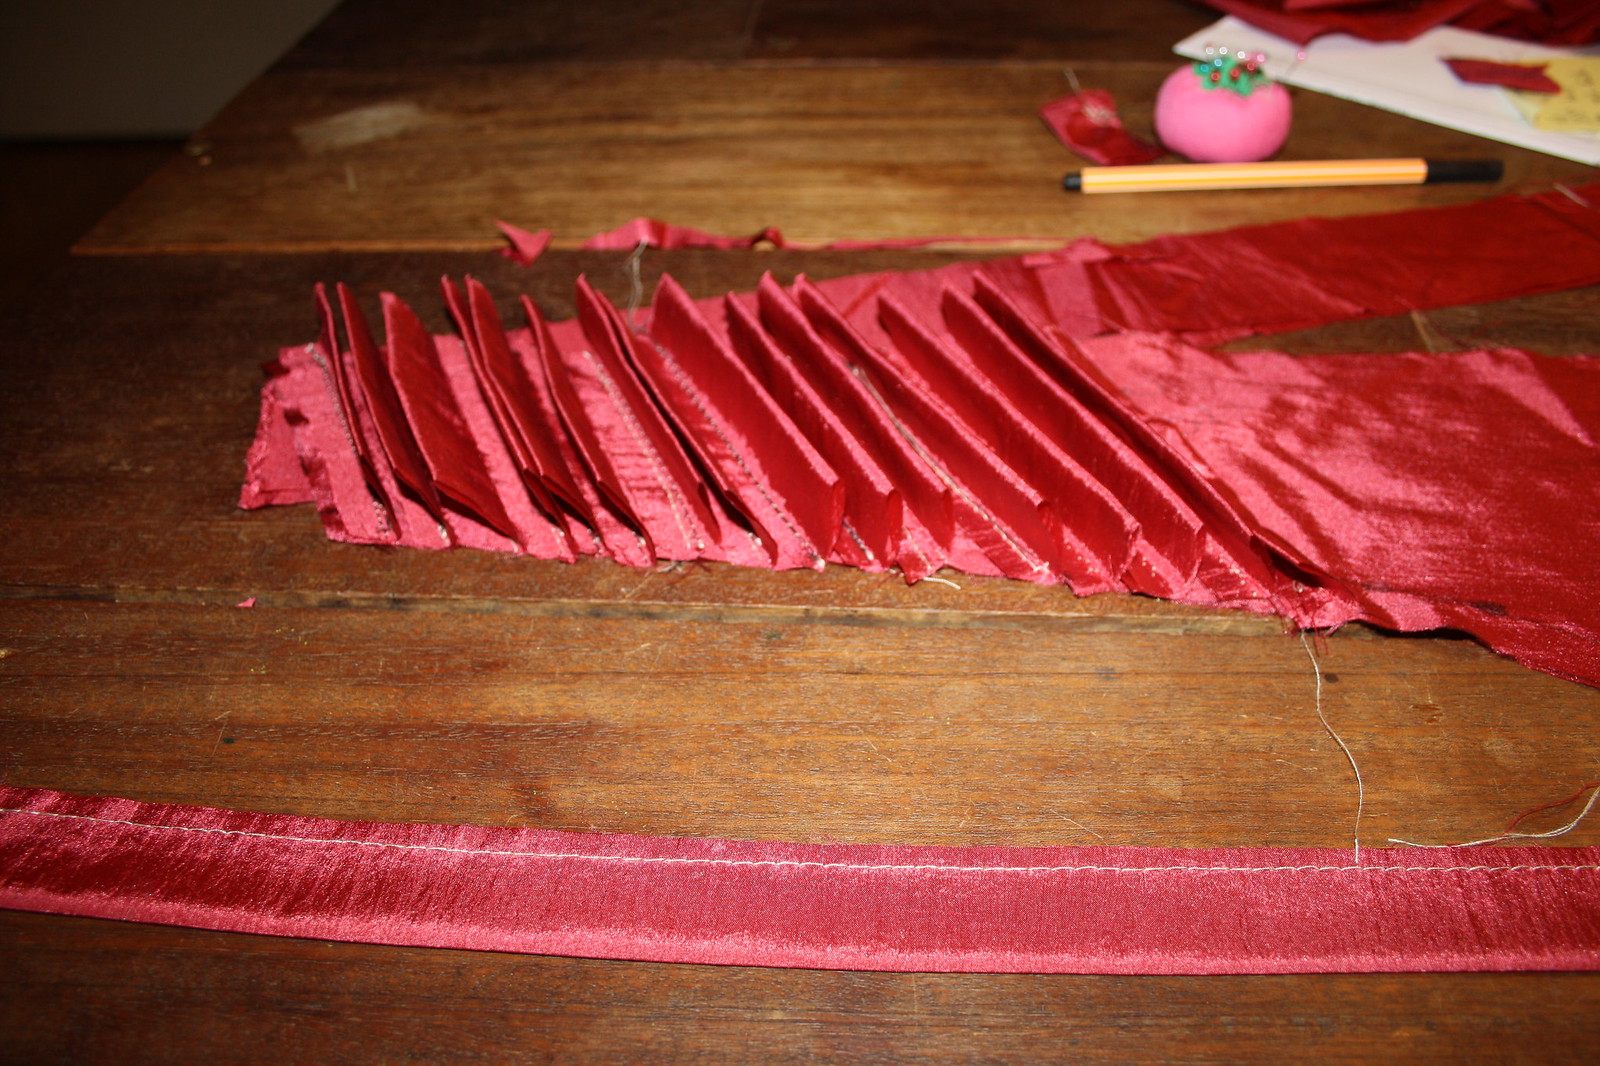
I have one panel finished (after 6 hours of work) so I will do only one panel. With the prototype I didn't really bother with making it even and all, but I will do so with the real thing obviously.
Unfortunately I forgot to take a picture of the finished panel so you will see that tomorrow when I putting the bodice together.
My fabric hasn't arrived yet, nor have I received a shipping notice, but hopefully I'll get that soon. Since I plan to have the bodice finished this weekend.
Subscribe to:
Posts (Atom)